
Zippered Pouches are useful for all sorts of things and side pockets allow you to keep separate those small items you don’t want to lose.
Total Project Time: 2 hour

I often have to travel for work, but I don’t ever want work to keep me from the board games I enjoy playing nightly. That’s why I travel with two laptops: one for work and one for running tabletop simulator. But double laptops can often mean double trouble as I have to carry around two chargers and make sure I have all the right supplies for each system. And one trip, I didn’t. I forgot the charger for one of my laptops and I was devastated thinking I wouldn’t be able to play board games all week. So, in my stubbornness, I went out and bought a new laptop charger.
Now, you might be thinking (and rightfully so) what they heck does this have to do with a zippered pouch? The new charger I got had removeable heads and no case to keep all of the parts together. Therefore, I decided I should make my own to keep everything in one place. Where I won’t lose it. A zippered pouch is the perfect solution for keeping everything in together and it looks super cute!
Check out the Craft section of MCG for more fun patterns in forever fabrics or more unlimited ideas.
Supplies

For this project, I collected the following supplies:
- 2 Zippers (of the same color)
- Fabric for the exterior
- Stabilizer Fabric
- Fabric for the interior
- Fabric Tape
While there aren’t too many supplies needed, this project required a lot of minute details.
Process
All right, this project felt like a little bit of a doozy because the design and everything that needed to be taken into consideration. Remember not to rush so you don’t end up doing work twice! All outside fabric should be reinforced with the stabilizer fabric.
01
Adding the Side Zipper
I started this project with the side pocket. The first step was drawing (on the wrong side) the template for where the zipper would go. This template includes the center line where the zipper will be places, and the box around it for how much of the zipper fabric will be showing. I capped the ends of the rectangle with triangles to help with edging all four sides.
And then it’s time to cut around the lines and fold the fabric over. This creates our opening. I like to use the fabric tape here to keep the folds in a stationary position. This process is then repeated on the fabric for the interior of the pouch. The Interior fabric used for this section should be twice the length needed as it will be needed to create the pocket. The next step is placing the zipper.
Once again, I used fabric tape to get around the need for sewing. The fabric tape is very stable so it can keep everything in place. I first centered and taped the fabric to the outside cloth before doing the same with inside fabric. To finish off the pocket, I reinforced everything by sewing along the edges. I really like the visible edge look.


02
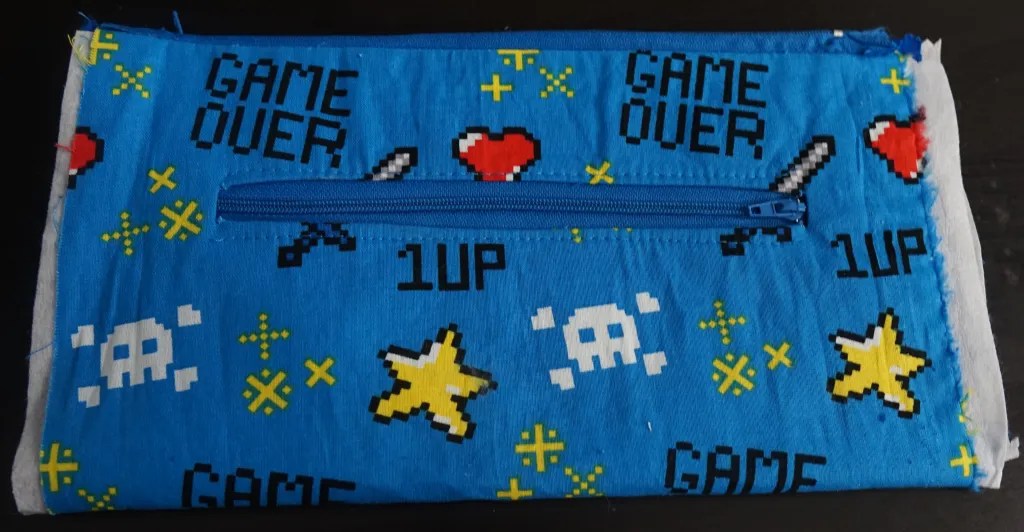
The Exterior Pocket
To make the exterior pocket, the lining should be folded over and set in the proper locations. Doing this will hide the zipper from a direct line of sight. The zipper becomes the only access to the inside of the pocket. All sides are then sewn and cut to finish. I really love finishing all my pieces with the pinking shears, even the hidden areas. I feel like this elongates the lifespan of the bag because it deters the edges fraying.


03
Attaching the Main Zipper
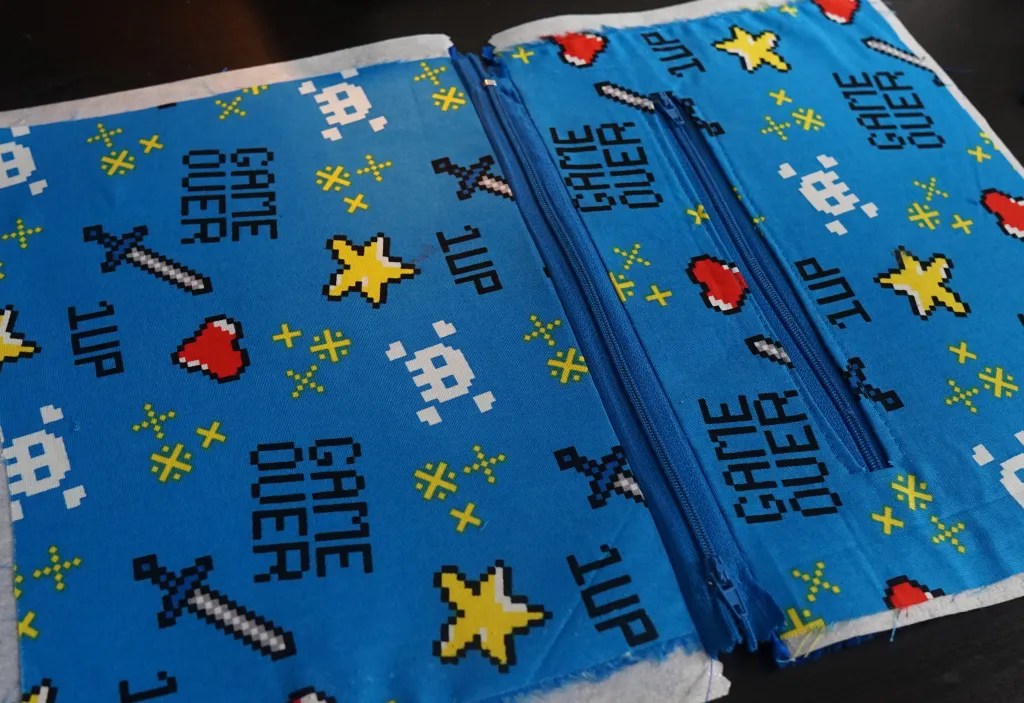
After the pocket is finished, I decided it was time for the main pouch. Which means, we need another zipper! This needs the outside and inside fabric for both sides of the pouch. Using one set of outside and inside fabric, sandwich the zipper between the two. The right sides of both fabrics should be facing in. The metal part of the zipper will not be visible. It should look like you’ve lined up three pieces of fabric from the top.
Then we sew. The zipper will be sewn in with no visible sewing lines! After we make our line, the fabric is flipped over so the zipper and the right sides of the fabric will be showing. This step is repeated on the other side of the zipper – giving up both sides of the pouch!


04
Making the Pouch
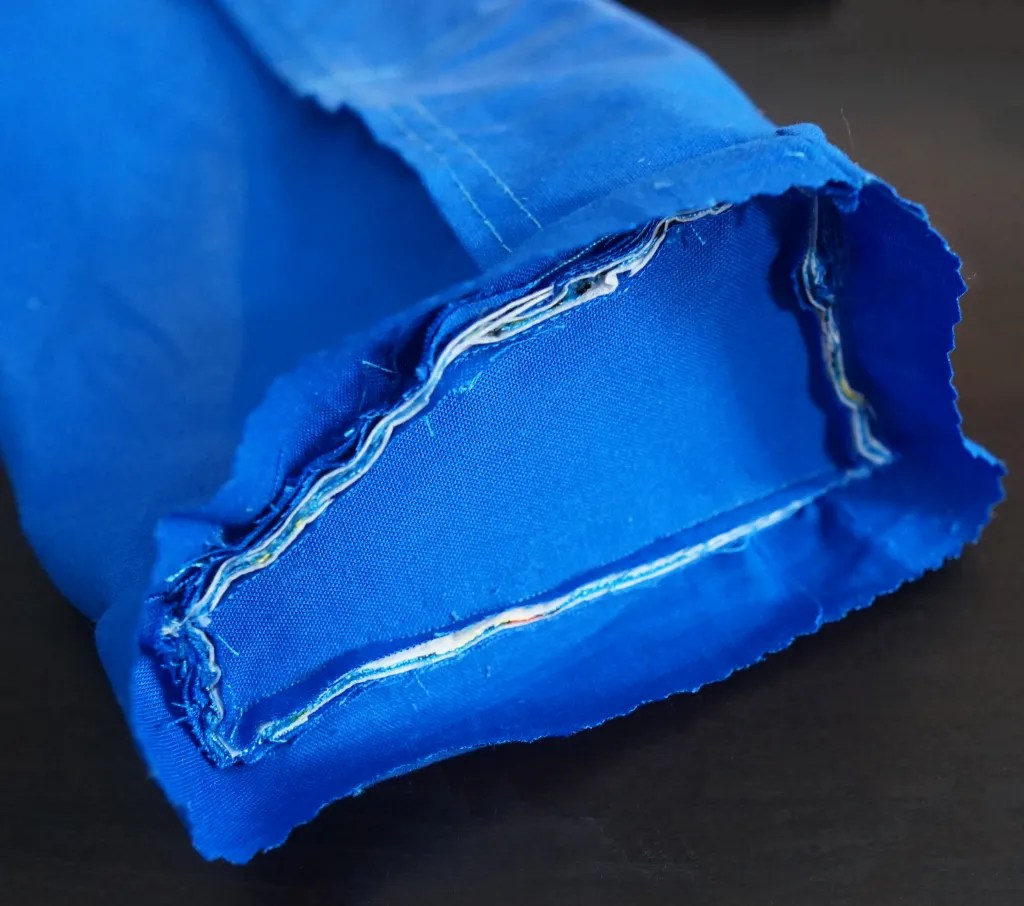
To make the pouch, the inside liner and outside material must be managed separately. Each section should be sewn together along the bottom edge to effectively make two pouches. The fabric then had to be turned to tuck the interior pound into the exterior pouch. I have four layers of fabric stacked: outside, inside, inside, outside.


05
Hiding the Seams
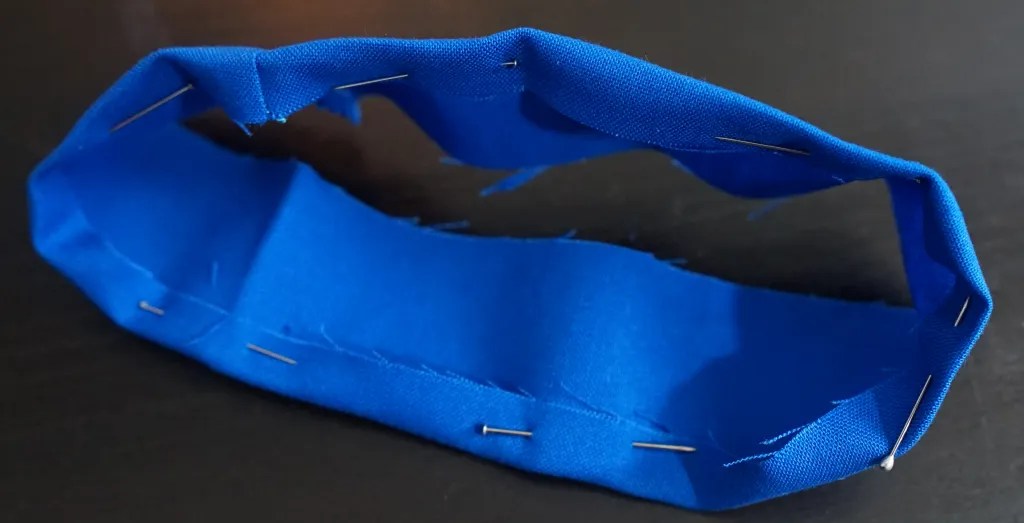
At this point, you can either choose to add a shape into the sides or keep the pouch flat. The seams will be visible with either choice, so I decided to add trim to hide the messy edges. I also went with a shaped side akin to a trapezoid. I like the shape but, boy, was this a challenge.
It felt like working in a crawl space because there wasn’t much room to move and do the work. To start, I placed the shaped fabric in the side opening and put a strip of fabric around the area. The fold over technique was again used to hide the seam on this edge.
The fabric was then tucked into itself to create a clean look. I used fabric tape to close it because I was getting frustrated, and I was nervous about accidentally sewing something I did not want sewn. I’m still working on my sewing skills! Another way of finishing this is by hand using a hidden stitch.


Reflections
I do absolutely love how this bag turned out. It fit my needs perfectly and put everything in one easy to use place – making travel much more convenient and organized. I do think my sewing skills with edging and zippers still need a little work. But that’s what practice is all about!


Lessons
Zippers and Fabric Tape
I was surprised by how well the zippers fused to the fabric tape. It did an excellent job of sealing everything together and I have yet to see any separation between the two. Fabric tape is fantastic for those who may not be so confident with their sewing skills. It’s an easy work around that can give a great look.
Quick Recipe
Instructions
- Cut out area for zipper in the outside pouch fabric, and near an edge on the inside pocket fabric.
- Use fabric tape to attach zipper to cut out areas
- Fold over inside pocket fabric and sew around edges.
- Sew outside pouch fabric and corresponding inside pouch fabric to the same side of the zipper (zipper inside, fabrics facing right side in). Fold out to reveal right side of fabrics and zipper.
- Repeat with the other set of outside pouch fabric and inside pouch fabric.
- Sew the bottom edges of the inside fabrics together.
- Sew the bottom edges of the outside fabric together.
- Turn project so the pouch would look inside out as if completed.
- If using shaped side: pin sides in place, wrap a strip of inside fabric around the edge positioned inward. Sew along outer edge
- Turn strip of fabric and tuck inward to hide fabric seams.
- Use fabric tape to attached edging.
- Flip inside out.


Leave a Reply