

This infusible ink shirt allows for freedom of design and a result that looks professionally made.

My family has a love of Tron. Our wedding two years ago was painted in the Tron colors. I am beyond excited for the newest movie (have not learned anything about it yet, so no spoilers!). But that’s not the reason I kicked off this project. It was for a family event where we were all going in a “collegiate style” of shirt. There was somehow an abundance and a very limited number of shirt options.
Then I remembered the existence of infusible ink. Making my own infusible ink shirt version seemed like a fun approach, and I would be able to work in those core elements for both shirt style and for Tron. There were quite a few things that I learned from this project, but being able to make a shirt from scratch was a real sense of achievement. Especially since the ink really infused into the fabric. It gives off an official kind of feeling.

Check out the Craft section of MCG for more fun patterns in strings and things, or more unlimited ideas.
Supplies

This infusible ink shirt project required only a few materials. I used a Cricut for cutting out the pattern, as well as a weeding tool to remove the excess material. For the materials, I had my sheets of infusible ink (one was blue, and the other was black) and the T-shirt. The other tool that I ended up using was a Cricut press. This is very similar to an iron, but I appreciate the ability to have more precise temperature controls and the built-in timer.
Process
Preparing the Material
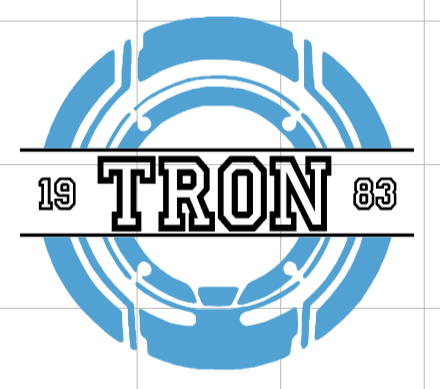
There are a couple of different prep steps when it comes to making this infusible ink shirt. First would be creating a design. Since I was focusing on Tron, I went with the classic disc. This proved to be a bit of a problem as finding a good starting file was more of a task than I expected. And once I had the image where I wanted it, I went to add in the text.
The font I used is a very “collegiate” or, at least, it felt like the font I was seeing on most designs. I wanted the shirt to have the “Tron” title as well as the year the original film was released. I decided to have the year split in half with the “18” on the left side and the “83” on the other. The numbers were a little smaller than the letters to provide some contrast since I used the same font for both.

After cutting the design out, it was time to weed away the unneeded parts of the design. This proved easy in some places and difficult in others. There were a few places where I kept the small details and got rid of bigger sections. But the small pieces didn’t always like that. Still, I got it done to the best of my ability, although I did manually have to adjust/add back in some pieces.

Let’s Add Some Heat!
The next step was infusing the ink into the infusible ink shirt. Placement is very important because you only get one shot at it. I laid the shirt out on the floor to really get the placement down. Then I shifted to the heat pad. I put the pad inside the shirt to avoid the ink going through both layers. While I was setting the design, the heating press was warming up. I can put the exact temperature that I wanted.

The ring went onto the shirt first, and I pressed the design for about 60 seconds. It was crazy to me how much of the ink came off the sheet and went onto the shirt. Basically, all of it. Having a while scrap left was wild. Then I put down the second color (the title) and went through the press process again.
Something weird did happen with the shift discoloring slightly. While that can happen, usually the color changes back quickly. This time it didn’t. I’m not sure if that was because I pressed too hard or added too much heat. All I know is that I could not recreate it (even when actively trying to). But I would recommend using a medium touch instead of a heavy hand

Reflections
While this shirt didn’t turn out perfectly, I still think it looks cute. I love how seamless the ink looks. It doesn’t (necessarily) look added or placed on top. The ink can take to the fibers of the shirt and really make an infusible ink shirt. I am curious to play around more in this world, especially with designs and a lot of colors. I am curious to see if colors can be added at the same time, or if the one layer approach needs to happen.

Lessons
Types of Fabric
Some fabrics take to the infusible ink more so than others. Anything made of a high amount or 100% polymer will naturally take the color better. There is effectively a chemical reaction to bind the ink. This creates a vibrant and permanent design. 100% cotton, on the other hand, has quite a few problems with the infusible ink. The ink does not bind as well, so the color will come out less vibrant and give more of a vintage vibe. That would be fine if not for the other issue that comes with cotton. When washing the fabric, there is a higher chance for the ink to come out and become even more faded.
Pattern


Infusible Ink Shirt
Equipment
- 1 Heat Press
- 1 Heat Press Mat
- Design Template see supplies section of main article
Ingredients
- 2 sheets Infusible Ink one blue and one black
- 1 Polyester Shirt gray
Instructions
- Cut out design on the sheets of infusible ink. The ring should be on the blue and the words should be on the black. Remove any excess areas.
- Warm up heat press to 375° Fahrenheit as per the units’ instructions.
- Place the heat press matt in the shirt so it is sandwiched between the layers. This should be placed under the working area.
- Line up the ring in the desired area and press down on the infusible ink with the heat press for 60 seconds. Remove, set up the words in the desired area and press for 60 seconds.


Leave a ReplyCancel reply