
Ah, my dear lizard cult. These little weirdos are a beloved faction with a lot of losses under their belts. The lizard cult has an opaque scoring system which tends to have them behind on victory point track. We have seen a lot more flexibility for the lizard cult with the introduction of Advanced Setup or AdSet (the new setup cards that were included in the Marauders Expansion). This flexibility gives the lizards a lot more room to operate and become the true cult they were destined to be.
Check out the Game section of MCG for more written reviews or check out the MCG YouTube Channel for Videos and the Reading Rulebooks Podcast!
Download the Guide Here:


How do they win?
The lizards score by fulfilling two conditions; having gardens on the board and having a card in hand matching the gardens suit. If these conditions are fulfilled, a lizard cult player can score every round and have that continuous growth the lizards crave. Lizards are a slow and steady faction. They tend to have a constant victory point gain potential and very rarely will they get a big burst in points like some of the other factions (i.e., Woodland Alliance, Keepers in Iron).
They are like the Eyrie Dynasties in the fact that they are constantly growing. But unlike the Eyrie, this is not a passive gain. They need to do active work to accomplish the win. Due to their lack of mobility and battle opportunities, the Lizard Cult cannot rely on points from removing buildings and tokens like other players. And due to their crafting limitations, crafting abilities and items are only done if an opportunity arises. It can be hard to plan for these types of points.
I heavily advocate for scoring every round. This is the most consistent way that lizards win. Is it possible to win without scoring every round? Yes. Is it likely? No. One of the biggest downfalls I’ve seen from Lizard players is not scoring that first round when able, causing them to be a turn behind the other players.
It’s typically in my play style to get points when I can regardless of how it makes me look on the point tracker. Some people like to sandbag points to hide their position. Lizards cannot afford to do this unless the rest of the table is actively trying to kill each other.
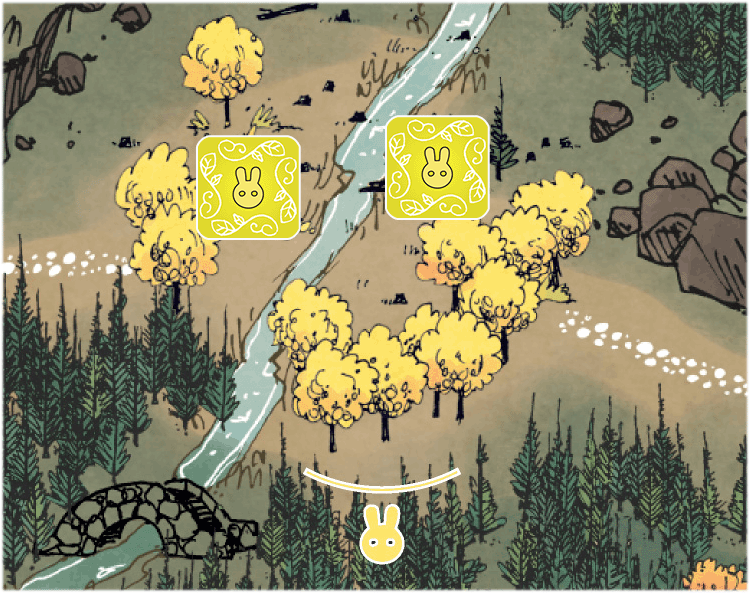
gardens and scoring
The Gardens track is the biggest source of victory points for a Lizard Cult player. Having one garden of a suit on the board does not get you any points when scoring (which is discussed in the daylight section). Having two or three gardens on the map will get you two points and so on.


The fact that three gardens does not bring about a points advantage makes that third garden more of a liability than a benefit because of fear of the faithful.

Fear of the faithful is the italicized text written just below gardens; “When a garden is removed from the map, discard a random card from your hand.” The more garden out there, the more liability. Cards are your available actions and losing one can be devastating.
going “wide”

This is probably the most common strategy with the lizards. It’s also my favorite. Going wide means placing out gardens in each suit. Having two gardens out in each suit is ideal because it offers the best potential. When scoring, there is a potential for 6 points. Since all three “plus card” symbols are revealed. This strategy also gets the most card draws which is critical for reasons we’ll get into a little later.
Going wide allows the most flexibility because you can adapt your hand, so it is able to work in any situation. It also allows a player to pivot easily if a certain suit or clearing is getting too contested.
going “tall”
Going tall is a less commonly seen strategy. This is when a player focuses primarily on one suit. There are five possible gardens that can be placed in any given suit. This strategy is focused more on an opportunistic opening of clearings of a particular suit.
The biggest benefit of this strategy is the victory point to card ratio. In the going wide strategy, a card would be worth 2VP but in the going tall strategy a card is worth 4VP. Since you burn cards to get points, this allows a player to get the most victory points out of a single card. However, the point efficiency from gardens is now down because 5 gardens in is equal to 4 VP while six gardens in the wide strategy can be worth 6 VP.

But there is a major risk in this strategy and that’s the RNG of the deck. If you go all in on mouse, and are not able to draw any mouse card, this will prove to be a very difficult situation. As the Lizard Cult, you typically want to score every round and this strategy can be more boom and bust in terms of victory points.
faction abilities
Revenge

This is one of the most interesting aspects of the Lizard Cult. When a lizard cult warrior dies, they go to the acolytes’ box instead of going back to the supply.
Acolytes allow the Lizard Cults to perform Conspiracies – which I’ll get into more in the Birdsong section. Conspiracies give the Lizard Cult more actions. So, the more they get hit, the more they can do on their next turn!
hatred of birds

This is self-explanatory. The Lizard Cult hates bird cards. They use cards to perform actions (which I will discuss in the daylight section), and bird cards have more limited options for action choice.
pilgrims

This is one of the most devastating faction abilities. The Lizard Cult, regardless of warrior count in a clearing, will rule the clear so long as there is a garden in the clearing.
This can create a very interesting balance of having fewer warriors in a clearing but still ruling the area.
This can also be very frustrating for factions who might want to get through that clearing but do not control any areas on the other side. But it also can be used to lock factions into a clearing. If they don’t have the rule to move out, then those warriors can get trapped relatively easily. This makes their only option to fight the lizard cult to get out of the clearing.
birdsong
adjust the outcast
The outcast is extremely important to the Lizards, but they don’t always have control over which suit it falls onto. The Lost Souls is composed of all the cards that were discarded in the previous round. The most common suit becomes the outcast.

If this suit already is the outcast suit, the outcast becomes hated. A hated outcast gives a discount to performing conspiracies. If two suits are tied for the outcast, the outcast does not move but it does flip to hated if it is not already hated. This is a major change to the lizards that happened in the later printings (it was different in the 1st printing).
The outcast suit will dictate which clearing you can perform conspiracies. It also tells you which gardens can be used for crafting.
discard the lost souls
The Lost Souls are the cards that were discarded in the previous round. After the cards are used to determine the outcast suit, the remaining lost souls are then put into the discard pile as normal.
*Important Note* The dominance cards go into the lost soul’s pile. They are only removed and placed on the side of the board after going to the discard pile. While the dominance cards are in the lost souls, players do not have access to them and cannot swap cards to take the dominance cards.

perform conspiracies- Crusade
Performing Conspiracies are some of the key actions for the lizards. These actions are not taken often but can be quite impactful. The first action we’ll dive into is crusade. This is one of the more under-utilized actions in my opinion.

The lizards can spend two acolytes (one if the outcast is hated) to either battle in any outcast clearing or may move from the outcast clearing and then may battle in the destination. The “may move and then may battle” is key. This is the only way the lizards can move the pieces around the board. Otherwise, you’re just hoping to die and pop up somewhere else.
Crusade is not only good as an offensive measure but a defensive one as well. If you have an important clearing that is surrounded by clearings of other suits, you will be able to protect it with the crusade. For example, if the outcast suit is fox, and you have a fox clearing next to your clearing with two bunny gardens, you can crusade one lizard over and fight with a massive army. I tend to leave at least two lizards in the acolyte box that I deem as my “safety lizards”. They are specifically for crusading even if the outcast suit is not hated.
While Lizards don’t want to start a fight, crusading is critical for defending your gardens against a woodland revolt or a Lord of the Hundreds mob token. Just because lizards don’t want to fight doesn’t mean they shouldn’t try to remove cardboard. If the opportunity arises, take it. You are gaining points and denying points from other factions that, let’s face it, can easily take out the building or token.
perform conspiracies- Converting
Converting is another major action for the lizards. This action will allow lizards to remove a warrior in a clearing and then replace that warrior with a lizard from the supply. I love being able to take out key warriors using this action as well as finding point opportunities. By converting a lone warrior, you may now be able to crusade against something undefended. Finding those opportunities is important to the lizard cults point scoring capabilities.
perform conspiracies- sanctify
The last conspiracy is sanctify, which costs three acolytes (or two if the outcast is hated). This action is one of the showier actions that lizards have as they can transform a building into a garden regardless of warriors in the clearing. This seems like the most enticing action because it mixes getting points for cardboard and gaining gardens, but I think this action is a little bit of a trap.
While gaining a new garden can be good for points scoring, it’s not worth the investment unless you can protect the garden. Spamming gardens onto the board is going to hurt more than help if they are easy for other players to remove (see fear of the faithful under gardens and scoring). Not only are you giving other players points but you’re also limiting your next turn.
Every card in your hand is a potential action. Losing a garden will cause you to lose a random card from your hand. So not only are you losing a potential action, depending on the composition of your hand, you could also be losing an action you needed (like the one card you might need to score).
daylight
Daylight is where the Lizard Cult takes a majority of their actions. The player will reveal cards from their hand to do one of four potential actions. Because Lizards have a hatred for birds, Birds will only be able to do one type of action while the suited cards in hand can do one of three actions.
You do not have to reveal your entire hand, but I would encourage it because you don’t want to be the one limiting yourself. That being said, only reveal the cards you can use. Don’t reveal a card if you don’t have a planned action for it. This is revealing excessive information and is not allowed by the rules.
build
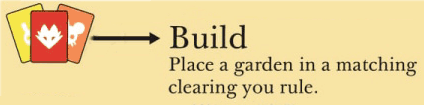
The first action that lizards can do with a suited card is build. This will place a garden from your faction board onto a matching clearing that you control.
It’s important to note that rule is required for lizards to place a garden. It’s easy to think that since gardens cause automatic rule, you don’t need to have rule to placer the garden but that is not the case.
I typically prioritize mouse and bunny clearings. Bunny clearings can offer large VP bursts from crafting items as well as access to cards that have great effects. Mouse clearings offer more consistent and steady victory points from crafted items as well as the opportunity to craft “murine broker” which is the best card for the lizard cult.
But I would mainly argue to build in the suits that matches your hand. The lizard cult is about being flexible with the cards you are dealt. If you try to force one suit over another, you might find yourself stuck in a corner with no scoring opportunities. I always try to focus on placing gardens in a way that helps me use the score action (see below).
Putting down two gardens of a suit will allow you to start scoring in that suit. Therefore, the lizards tend to love clearings that have two building slots. I talk about this a bit more in the key concept section under Clumping Gardens Vs. Spreading Gardens.
Unless you are specifically going for a “tall” strategy, I would recommend staying out of any three slot clearings. Other factions have buildings that each give a benefit so those three slot clearings will be very appealing to them. This makes those clearing obvious targets.
recruit
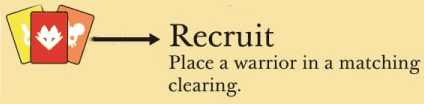
The next action for suited cards is recruit. This is the main way that lizard players can expand across the board.
Lizards can pop up in any clearing regardless of rule or connections. Have an army of lizards in the northeast corner and want just one in the bottom left? If the card matches the clearing suit, there are no other limitations!
For recruiting, I would focus on areas where you want your lizards (i.e., where you have gardens or where you want gardens). When it comes to other players, most factions won’t attack you if it’s not necessary. If you’re looking to get acolytes because of a battle, then the lizards should be placed in the way of those factions who have battle built into their action economy. Know that Eyrie has a battle in a mouse clearing? Put a lizard in their area to give them an “easy battle”. This also works for factions like the Lord of the Hundreds and Keepers in Iron.
score

Scoring is a critical step to the lizards. It is their main way to get points.
Each turn, a lizard player can discard a card to score the gardens of the matching suit. It’s important to note that this action discards the card into the lost soul’s pile.
Another important note about scoring is that you can only score once per suit each turn. So, you can score one mouse, one bunny, and one fox. Since this is the case, it’s another reason that I like going wide instead of going tall. There is a larger point potential and you’re not putting all your eggs into one basket in case RNG decides it hates you.
Some advice that took a while to sink in was “score instead of keeping a potential item”. I’ll get into this a little more during crafting but it’s important to get the consistent points versus the more uncertain points. Also, keep in mind how many cards you will be drawing. It’s better to have a full or above full hand for the next turn than limiting yourself by spending too much now.
sacrifice

The one action that uses bird cards is sacrifice. This entails taking a lizard from the supply and placing it in the acolyte box.
This is the only way to get lizards into the acolyte box outside of other players killing lizards. Sacrifice is a useful action when there aren’t other actions to take.
I much prefer to have suited cards in my hand. It gives me more flexibility per turn, and I would rather place a warrior onto the board and try to get them killed then sacrifice them directly. At most, I wouldn’t want more than two bird cards in hand and that even feels like a stretch.
evening
return
The first step in evening is returning all the revealed cards to your hand. These cards return before crafting so make sure you use a reveal action with cards you want to keep and only score with cards that you don’t really care about.
craft
Crafting is both crucial and extremely difficult for the lizards to do. It’s all about the stars aligning and making sure that the outcast suit is in the right spot. The way I like to think about this is only the outcast suit gardens are open to the public. The others are closed for maintenance in the evening.
Crafting is all about opportunity. If you have the opportunity to craft, I would so long as:
- It doesn’t put you below 5 cards after you draw for your next turn. If you’re going to discard the card anyway, craft it.
- You will still have cards that you need to score next round. If crafting would get rid of your last mouse card and you have mouse gardens out, I would keep the card to score instead of crafting it. Items could be the exception but that really does depend on which other factions are in the draft.
- The card effect makes sense and gives you an active benefit.
See the Interacting with Other Factions – Vagabond section for more on crafting with the Vagabond in the game.
draw and discard
You would think that drawing cards and then discarding down would be a simple step without much thought process but there is a bit to think about in this step if you draw over your 5 cards limit. These cards are going to dictate your next turn so it’s important to consider what to keep.
What actions do you want to take next turn? Are you able to score? If yes, make sure to keep some cards in your hand to make sure you can take this action. Are there any other actions you would like to do? Again, I would recommend keeping suited cards over bird cards.
Another thing to keep in mind is the outcast. The cards you discard now can potentially influence the outcast suit depending on which cards you put in. This is not a sure thing, and it is just an attempt to change it. If the other players are determined to control the lost souls then there will not be much you can do.
The best advice I can give is be flexible! The lizards are all about adapting and making a good decision in a bad situation.
other key concepts
dominance card swapping (or dom swappin)
Dom swapping is very beneficial to the lizards. At any point during the Daylight phase, a player can swap a card in hand for the matching suited dominance card. This can allow for players to stack the lost souls because you are discarding one card to gain another card.
I would also recommend using dominance cards for scoring as it can provide consistent access to a suit. It can also put two cards of one suit into the lost souls and potentially sway that stack even further.

Dominance cards give safety. Especially because players can swap a bird card for a suited dominance card. This makes the lizards have more consistent turns in terms of scoring.
Even if you don’t need the dominance card, take it. You would rather have it for later than pass over it and give another player the potential to steal it from you. Losing a suited dominance card can really hindered the lizard’s game.
Clumping Gardens Vs. Spreading Gardens
If you are going with a wide strategy, there can be two approaches that each have their own benefits and disadvantages. In this section, assume the gardens being discussed are those of the same suit. Clumping gardens is the strategy of putting two gardens in one clearing and having a massive number of warriors in that clearing. Spreading gardens consists of having two gardens spread across two clearings with a modest group of lizard defenders.
Clumping gardens is the strategy seen most often since it is easier to control one clearing of each suit than it is to control two clearings of each suit. This is especially prevalent in the early game because it’s easier to build a garden and score on your first turn so long as your original garden is in a two-slot clearing.
While you control less clearings with this tactic, you also have more liability in one place. If an enemy decides to attack that clearing, you will lose two gardens and two cards (from fear of the faithful). This also gives your opponent two points which could make them see the clearing as more attractive to attack.
Spreading gardens can be more difficult to do. It requires more clearings but brings less liability. However, you can potentially target less contested clearing and try to push your opponents to care about the higher slotted clearing.
There are few points gained from a single garden clearing which might make it less attractive to attack. And if attacked, only one garden and one card is lost. This can make it easier to rebuild because you’re starting from the halfway point instead of back at the beginning.

Saving or Spending Acolytes
There is a lot of debate around when a player should spend or save their acolytes. Should you create an acolyte army and have a giant swing? Or should you spend the acolytes over the course of the game? My opinion would be it depends on what’s happening. There is not a real tried and true strategy when it comes to spending acolyte actions.
I am always on the lookout for opportunities to stymie the other players. This could be converting warriors to deter attacks on crucial lizard clearing. Or using crusade to eat up undefended cardboard points. I’d rather take them than give them to someone else.
I personally find several issues with hoarding acolytes. One – the game might never give you an opportunity to use them, so they become wasted actions. Two – you can miss out on several key moments because of the desire to hoard. Losing acolytes is much better than losing gardens, cards from your hand, and action tempo. Three – the hoard can limit the number of warriors available to use on the board. Nothing hurts more than trying to recruit only to realize half your army has been sacrificed to the lizard god.
Interacting with Other Factions
You are going to be annoying when interacting with other factions. While being annoying, you don’t want to be the one initiating aggression. You must be just annoying enough to make other people want to attack you without enticing them to go for your gardens. The below interactions are mainly examples of potential interactions, the game state will really dictate what is possible and needed.
Marquise de Cat

The Marquise de Cat does not have many interactions with the lizards. To be honest, they don’t really care about the lizards because they are generally spread thin and prefer not to fight with their limited actions. The most annoying thing the lizards can do to the cats is recruit in ways that will hinder their supply lines.
By hindering a major component of their scoring engine, you might be able to coax them into fighting your lizards just to remove the annoyance. Depending on the map, they might try to find a way around you or might try to out recruit you based on positioning.
Eyrie Dynasties
The Eyrie will never say no to a safety lizard. Make sure to look at which clearing the Eyrie needs to battle in based on their decree. I often like to frame it as a safety battle because it’s just one lizard and you won’t make other players upset with you. Perhaps you’re the one keeping them from turmoiling.

Woodland Alliance

The Woodland Alliance is one of the most difficult factions for the Lizard Cult to deal with. They tax cards if you’re not careful when you move and there is not much that you are able to do about revolts. This is one of the only times I might stay away from the lizards.
But, if the Woodland Alliance have already revolted, the remaining clearings of that suit are safe. And, better yet, sympathy tokens might dissuade other factions from coming into the clearing and trying to kill you. The relationship between the Woodland Alliance and the Lizard Cult has always been called a smoking gun because Lizards don’t want revolts and Woodland Alliance doesn’t want any potential sanctification.
Vagabond
If a vagabond is in the game, I prioritize crafting more than I normally would. You can play the card for an action, then play it for the craftable item (which is points), and then the Vagabond will come to aid you which gives you another card to replenish your supply.

It’s a very beneficial relationship. But be careful about the Vagabond becoming allied with the lizards because you don’t want them to move all your troops and make your gardens vulnerable to attack.
Riverfolk Company

The Riverfolk Company are the lizard’s best friend. They let you buy cards. More cards mean more actions! I would only recommend buying when it gets you a score action that you otherwise wouldn’t have or a craftable that’s an extra bonus because it denies the points and items from the remainder of the table.
It is very easy to overfeed the Riverfolk Company by purchasing too much so it’s important to either buy only a little or be sure to get warriors back before purchasing again.
Underground Duchy
The Underground duchy is one of the more difficult factions to deal with. There isn’t a great way to incentivize them to hit you. But there is a great way to be annoying and make them use up their actions. Using convert on duchy warriors will always be a good idea, especially when targeting lone warriors that the duchy is using to sway a lord.

Corvid Conspiracy
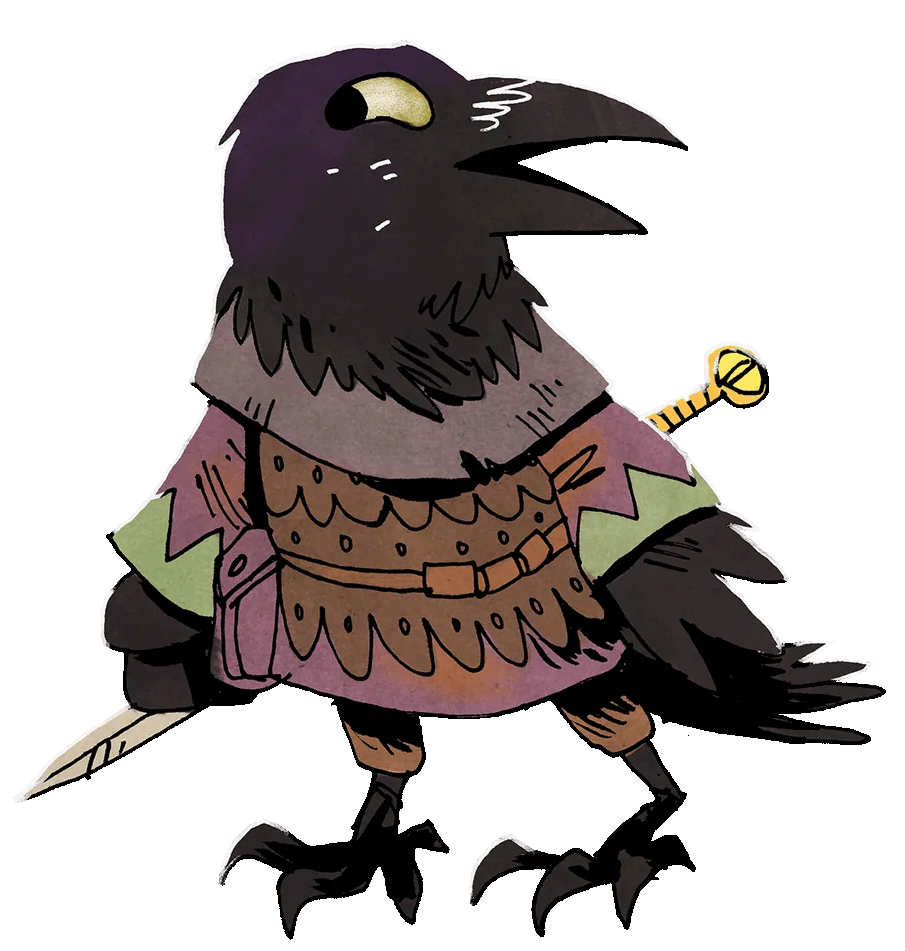
The Corvid Conspiracy is another faction that is difficult to interact with. They don’t want to fight you without getting cardboard and you both can spread anywhere to avoid choke points. Converting their warriors is the most that you can do to annoy them. This can also prevent the corvids from flipping plots if they only have one warrior with an unflipped plot.
Lord of the Hundreds
The Lord of the Hundreds absolutely hate the Lizards. The Warlord wants to be in clearing devoid of other factions and the lizards can be a thorn in the side.
By recruiting into the lord of the hundreds clearings, they are forced to spend their actions whacking down lizards instead of going on the offensive in other clearing. This can also get you a decent number of acolytes. The Lord of the Hundreds provides one of the best acolyte farming loops out of any faction.

Keepers in Iron

The Keepers in Iron are a nomad faction that shifts across the board. They also hate the Lizards. Getting past Lizard gardens can be near impossible and very frustrating for a Keepers in Iron player. If the Lizards occupy a critical clearing, the Keepers in Iron with either must fight their way through it or find a way around it. Against the Keepers in Iron, spreading out your gardens across multiple clearings will give the Keepers in Iron less room to move around the board.
Starting Examples
For the following examples, the autumn map will be used as the map in play. Some important factors about the autumn map that the Lizard cult should take into considerations:
- All four mouse clearings have two building slots in them
- Only one bunny clearing has two building slots. There is potential for one other bunny clearing to have two building slots if the Vagabond or Lord of the Hundreds is in the game. (Remember to be careful of Mobs)
- Only one fox clearing has two building slots. There is potential for two other fox clearing to have two building slots if the Vagabond or Lord of the Hundreds is in the game. (Remember to be careful of Mobs)
- There is one instance of a double slot bunny clearing and a double slot mouse clearing adjacent to each other at set up.
- There is one instance of a double slot fox clearing and a double slot mouse clearing adjacent to each other at set up.
- Over the course of the game, only one instance of a double slot fox clearing and a double slot bunny clearing adjacent to each other can emerge.
- Over the course of the game, four instances of a double slot fox clearing and a double slot mouse clearing adjacent to each other can emerge.
There are three potential suits in hand that would dictate start up location.
1. Mouse

If the starting hand favors mouse cards. The clearing in the top right corner of the map is the clearing of choice. This clearing starts next to another double slot clearing and is generally out of the way of other factions. If you have 3 mouse cards in your starting hand, I would also consider the bunny clearing on the top of the map as your starting location.
This puts a toe into the bunny clearings for future expansion and allows you to put two lizards in the mouse clearing where you wish to build. It is a riskier strategy but can have a higher reward in the long-term game.
2. Bunny

If your starting hand favors bunny, I would recommend starting the top bunny clearing. This is going to be a strong start for any lizard player. Bunny clearings will give you the most bang for your buck (i.e., the best VP and potential skills from crafting opportunities). This clearing, while off the beaten path, might draw attention depending on the needs of other players.
3. Fox

If your starting hand favors fox, the double slotted fox clearing at the base of the map is the best clearing to start in for scoring on turn one. Long term, there is not much room for expansion in this area and expansion should be focused into other clearings. This clearing isn’t a real focus for other factions as fox clearing is the least sought after in terms of crafting.
A No Suit favored hand
If you have a hand that doesn’t favor any suit or heavily favors bird cards, I wouldn’t really recommend going lizards unless necessary. If you have a handful of bird cards, go play the factions that love having bird cards (Eyrie, Keepers in Iron, Marquise de Cat, et.)! While lizards can make use of birds, I don’t think it should be a player’s priority. Lizards like suited cards!
But, if you must be Lizards then where should you set up? The favorite clearing for the Lizards to set up in is the top right mouse clearing. This immediately gives access to a clearing with two building slots in the mouse suit and the bunny suit. It also gives access to a possible two building slots in a fox clearing.


Leave a Reply