
Continuing my Great British Bake Off Challenge, it’s time for the Week Two Signature challenge: Slice and Bake Cookies!
Week 2 is always my favorite week because it usually revolves around cookies (or biscuits in the U.K.). Since I have a special love for cookies, it’s no surprise that I enjoyed these challenges. The Week Two signature is slice and bake cookies. These are cookies that have a pattern once sliced but look unassuming when still in a log. I relate these cookies to those Pillsbury holiday cookies with images on them.

When it comes to the design to use for these slice and bake cookies, there are multiple ways to make them. One way is combining sticks that will form the image in the end. The other way is to use a cutter and cut out the shape, stack them, and then build a border around them. This is the method that I used, but I would be curious to try the first one. Splitting the dough to dye it feels like the biggest challenge for me with the first method.
Check out the Make section of MCG for a variety of fun recipes, including delightful desserts and savory dishes that will tantalize your taste buds.

Standard Shape and Bake cookies don’t need any fancy ingredients. The recipes are on the simpler side, with only flour, sugar, eggs, and butter. It’s the flavor where I went a little off the rails. Vanilla would be commonly used. Since this is a Bake Off challenge, I wanted to kick it up a notch with the flavor. I was debating which extracts to use and ended up with the strawberry and mango.
Process
The Dough

Slice and bake cookies are very similar to sugar cookies since they both need to keep their shape. The first step in this process is making the dough. I made the dough twice over to have one dyed and the other plain. To start, I put the sticks of butter into a mixer and beat the butter until it was soft and fluffy. Then I added in the sugar and let the mixer go until the two ingredients were fully integrated.
The next step is to add the eggs and flavoring. For a standard extract, one and a half teaspoons are needed, while others might need more or less depending on the flavoring. I added the dye at this point in time, but I wonder if it can be added later. The last ingredient to go into the bowl is flour. There is no leavening agent since keeping the shape is the biggest goal for shape and bake cookies. After the flour is added, the dough will become crumbly and can then be kneaded into a ball.

Assembly

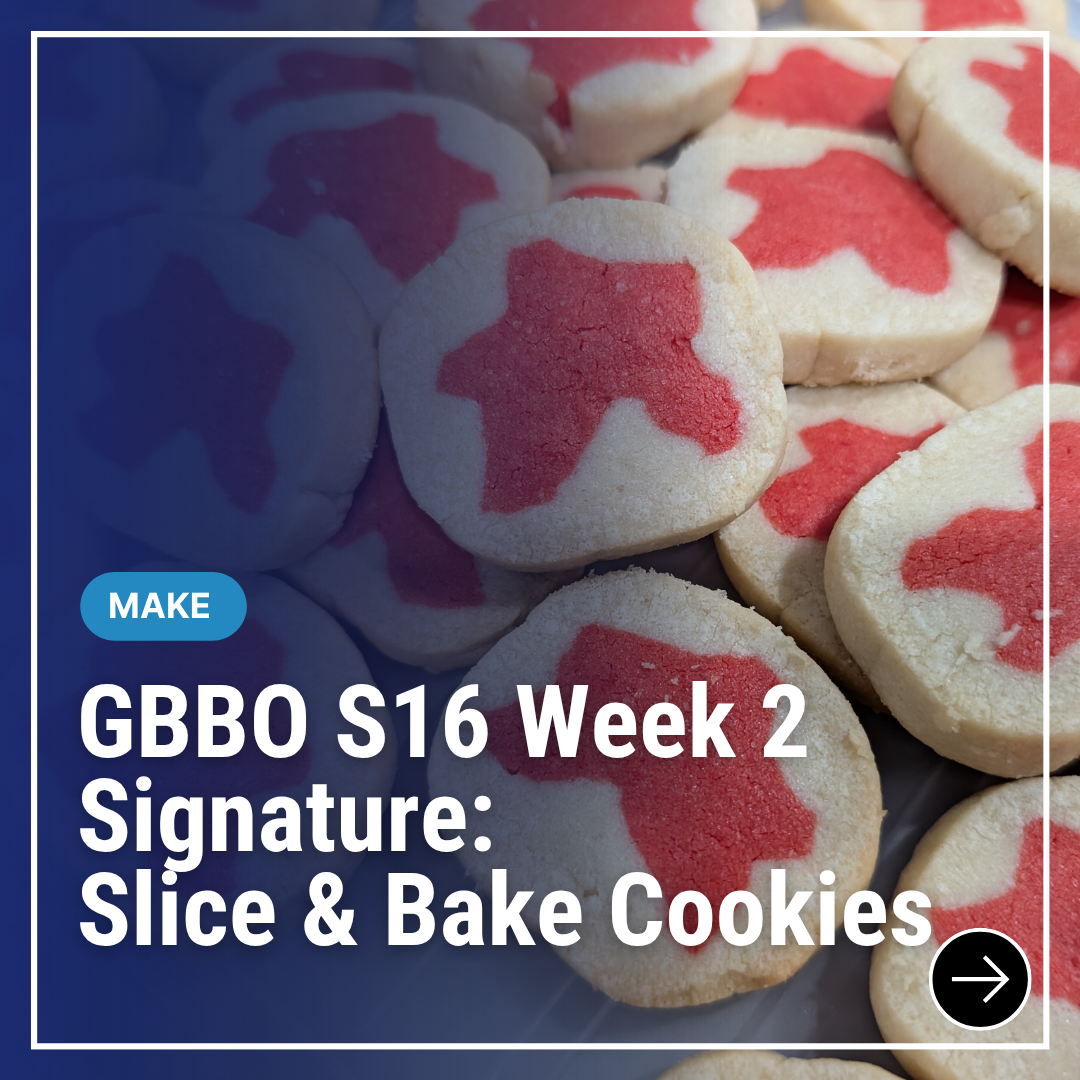
And then it was time for assembly. I had two doughs to work with since I made a second batch and dyed it red. Starting with the red dough, I rolled it out into a mat and used a cookie cutter to cut out the shapes. I wanted to use a meeple because board games are a part of me. I cut as many as I could and lined them up back to back to create a giant meeple stack.
Then I used the undyed dough to fill the sections around the meeple. I wanted to have all the holes filled and a border around the meeple once baked. A part of me wondered if I should have added a small amount of leavening agent in this dough to encourage slight spreading but not impacting the shape.


The assembly left me with a log of dough. I chilled the dough for a little bit just to help the flavor rest, but also to make the log keep its shape once cutting starts. After the dough log comes out of the fridge, it’s time to fulfill this cookie’s name. These slice and bake cookies reveal their image after being cut. The second dough and cutting did impact the shape a bit, so I wonder how I could approach that better. With the cookies sliced, it was time to bake.
Reflections
The slice and bake cookies turned out both good and not so good. Overall, they turned out well; several of the cookies kept the meeple shape while others looked more like stars to me. That fact makes me a little unhappy, but I am also hypercritical of myself. Flavor-wise, I think it turned out well, but I also think it could have been stronger. Some of the flavors didn’t feel like they should have been more distinct.

Lessons
Thinking About Shapes
Materials have limitations, and sometimes I don’t always keep that in mind. For this project, I don’t think meeples were the right shape. I struggle to remember the limitations of the material. It’s also important to think about how materials might move under the pressure of being surrounded or impacted.
Recipe

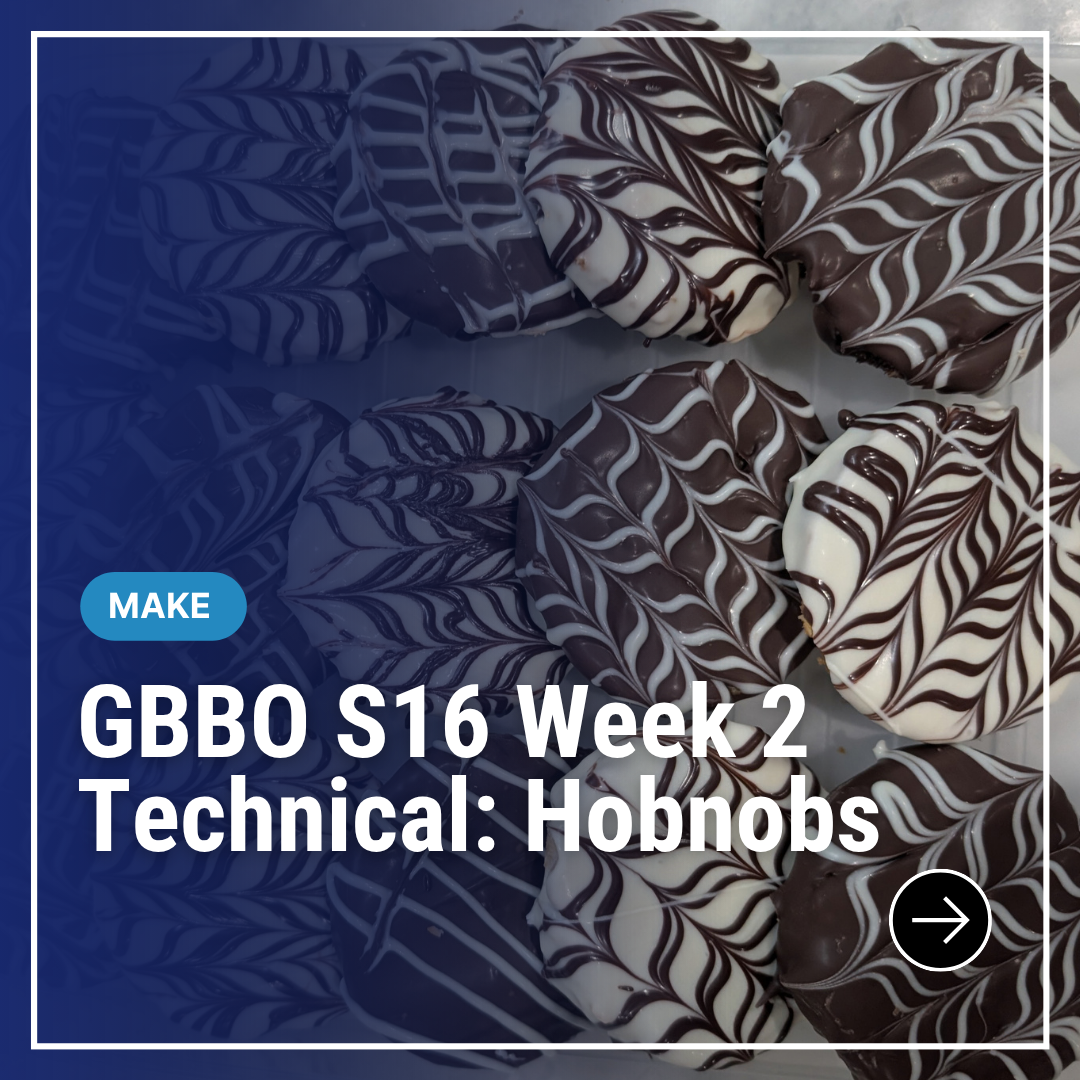
Hobnobs
Ingredients
Biscuits
- 1/2 Cup Unsalted Butter softened
- 3 Tablespoons Granulated Sugar
- 3 Tablespoons Light Brown Sugar
- 1 Tablespoon Corn Syrup or Maple Syrup
- 1/2 Cup All-Purpose Flour
- 1/2 Cup Wholemeal Flour
- 1 Cup Rolled Oats
- ¾ Teaspoon Baking Soda
- ¼ Teaspoon Salt
Caramel
- 1/2 Cup Granulate Sugar
- 1/2 Cup Heavy Whipping Cream
- 1/2 Cup Unsalted Butter softened
Chocolate Coating
- 1 3/4 Cup Dark Chocolate
- 3/4 Cup White Chocolate
- 1 Cup Caramel Chocolate or white chocolate
Instructions
- Preheat oven to 350° Fahrenheit.
Biscuits
- In a stand mixer bowl, beat together the butter, sugar, and light brown sugar until light and fluffy. Add in the corn syrup (or Maple syrup) until fully combined.
- In a medium bowl, whisk together the All-Purpose flour, the wholemeal flour, the rolled oats, the baking soda, and salt.
- Add the flour/oat mixture into the stand mixer bowl on a low speed until a dough is formed.
- Turn the dough onto a lightly floured surface and roll out into a square 25cm by 35cm. Using a 7cm cutter, cut out 12 rounds and place on a baking tray. Bake for 12 to 15 minutes or until golden brown. Cut round with the 7cm cutter to ensure sharp edges.
Caramel
- In a medium pan, add sugar and heat on a low heat until the sugar begins to melt. Shaking the pan from time to time, bring sugar to a boil and cook to a mid to dark amber color.
- Using a separate small pan, heat the cream until warm but not boiling.
- Remove the sugar from the heat and add in the warmed heavy whipping cream. Return the pan and bring to a boil (approx. 248° Fahrenheit).
- Remove from the heat and stir in the butter until incorporated.
Chocolate Coating
- Melt the dark, white, and caramel (if using) chocolate (separately) in the microwave or over pans of gently simmer water. Spoon a portion (100 g) of dark and white chocolate into their own piping bags.
- Using the remaining dark chocolate, coat 6 of the biscuits. Pipe 5 lines using the white chocolate evenly spaced out. Use a toothpick to feather the design.
- Using the remaining caramel (or white) chocolate, coat 6 of the biscuits. Pipe 5 lines using the dark chocolate evenly spaced out. Use a toothpick to feather the design.

Leave a Reply