
Dragon Eggs is a great fantasy décor that add a splash of color and can be customized into whichever form you like!
Total Project Time: 2 -3 hours

When walking around Scotland, we stopped in an occult shop to look around. I’ve always been attracted to these types of shops that are a fun mix of mystery, horror, and fantasy. My brother picked up a dragon egg and said, “I wonder how they make these”. And my mind was off to the races.
How does one make a dragon egg? How difficult would that be? After my brain got stuck in this train of thought for several days, I finally gave in and decided to try my hand at it. At this point, I was confident I knew how to do it and I just needed to get the basic materials before I could make my very own dragon egg.
Check out the Craft section of MCG for more unlimited ideas.
Supplies

This project needed minimal supplies but they weren’t always east to find. It took some time, but I was able to gather:
- A 4-inch Styrofoam Egg
- 400 rounded headed tacks
- Hot glue or Super Glue
- Glossy Spray Paint
I used a glossy navy blue, forest green, and black for the paint to create a base layer and some splatter which we will get into a little later. It seems simple but don’t let the dragon deceive you.
Process
01
Covering the Egg
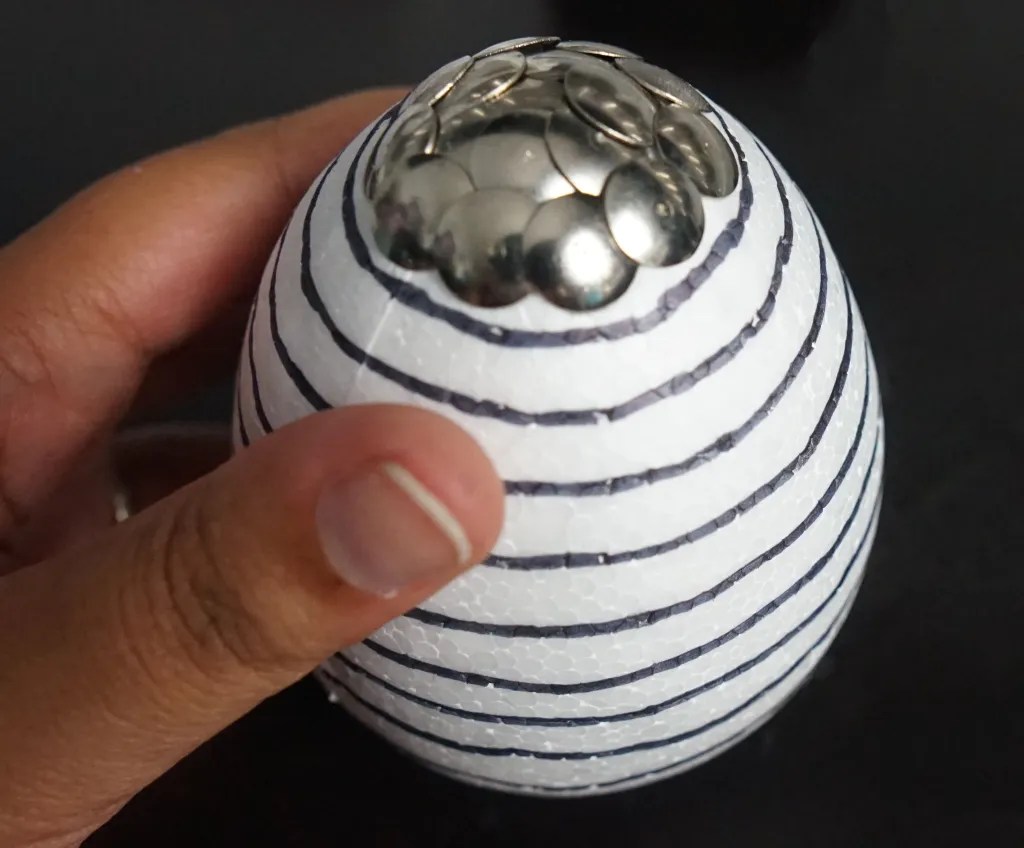
The first step in the process was to cover the Styrofoam egg in a way that created scales. I thought the best way to do this was by using round headed tacks. Yup! The scales are just an excessive number of tacks stuck into the Styrofoam egg.
But I wanted there to be some method to my madness. I ended up putting apply the tacks in rows. I started with on tack on the very top then built and layer around that. And a layer around that. And a layer around that.
Each layer, I tried to accomplish 2 major things. One – make sure that each tack has some overlay but the ack on the bottom was still visible. Two – Leave no Styrofoam showing to the best of my ability. Using these two rules as guidelines allowed my to come up with a very consistent albeit still a little random dragon scale.
That’s when I noticed that my scaled were staying in place. I pulled on one and quite a few came flying out. This is not what I want in a finished dragon egg so that’s where the glue comes in. Ah, glue, my best friend. I ended up using super glue, but hot glue would also work well for this type of project.
I ended up placing the glue directly onto the Styrofoam egg and then pushing the pins into the glue. I thought this would be more efficient than putting the glue on each individual tack. Although this method did leave a lot of glue residue on my hand. So is the price of my art 😉


02
painting
After I finished covering the eggs in the “scales”, I wanted to add some color to the dragon eggs. There might be some eggs that are silver in color but I wanted to go with the more colorful dragon eggs. Because dragon eggs are a very real thing and I wanted to mimic them as closely as possible.
To get the coat as even as possible, I decided that using spray paint was the best way to go for this step. But then I had to deal with the problem of how to you approach spray painting a round surface. I decided to balance the eggs on a small dixie cup and they basically became my stand.
I ended up doing several coats to get the whole project covered. The first was to get as much as possible of the visible surface. Then I waited about 20 minutes (ish) to allow the spray paint to have a quick dry. I turned the egg to have access to unfinished section to fully cover the egg in paint.
Looking at the egg, it seemed a little static to have just one color. And dragon eggs often have the black splatter from the environment or other elements that have affected them. So I decided to use the black spray paint to add a bit of a splatter effect. I was hoping to get a burst spray effect on it instead of an even coat. I love the way it turned out. And now, I have a set of dragon eggs!


Reflections
This was the first time that I was really working with spray paint. I did feel that I had to work on my sweeping technique to get the even spray on a rounded shape. There was a lot of learning on the fly for this project. Especially when it came to making a splatter effect.
I felt that the paint didn’t want to give me splatter as much as it wasn’t to do a full spray that covered the area. A lot of trial and error but the end result looks amazing. They came out in the exact way that I imagined.


Lessons
Tips for Using Spray Paint
Some helpful tips that I found for spray painting are:
- Make sure the surface you’re working with is clean and dry.
- Make sure to paint when the temperature is high, and humidity is relatively low.
- Begin and finish spraying off of the object. Use a side-to-side motion and overlap the last painted area by about one-third.
- Don’t spray too much or too close to avoid paint accumulating and drippage.
- Make sure to paint in a well-ventilated area. For your health.
Quick Recipe
Dragon Eggs
Materials
- 1 4-inch Styrofoam Egg
- 400 Round Headed Tacks
- Hot Glue or Super Glue
- Glossy Spray Paint blue, green, black
Instructions
- Cover a small area around the tip of the Styrofoam egg with glue. Place one tack on the tip. Places tacks in an even circle around the original tack. This should act like a row around the original tack.
- Working in small areas, add glue and then add another row of tacks around the established rows. Repeat this until the Styrofoam egg is completely covered by the tacks.
- Using spray paint, fully cover the egg in the main base color.
- Add layers of paint splatter to add more visual texture to the egg.


Leave a Reply