
Needle Felted crafts is a fantastic way to take wool roving and make it into soft 2D or 3D structures!

I spend more time browsing the internet than I would like to admit, and I recently recognized the craft of needle felting. I have seen needle felted crafts out in the wild, but I have never registered that it was something I could make! A new craft felt like the perfect challenge for me!
Starting simply, I decided to craft a few 2D needle felted keychains. I thought a 2D structure would be the perfect way to get myself familiar with the craft before moving onto something a little more complicated. It did take a little while to get familiar with the art.
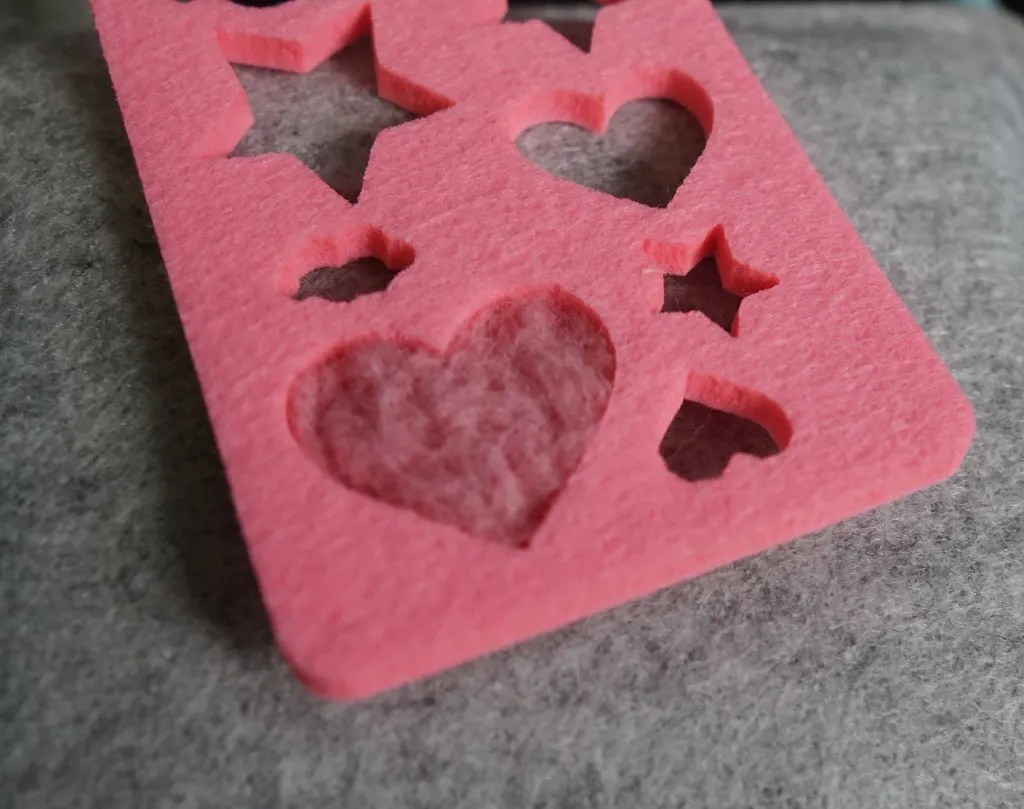
Also, to move slow enough to avoid stabbing myself. Since I am accident prone, I can never move too quickly with anything, or I’ll end up with more scars on my hands. I decided to make two needle felted crafts to start: a heart and a meeple! The heart used an existing template that I had while I decided to make the template for the meeple.
Check out the Craft section of MCG for more fun patterns in strings and things or more unlimited ideas.
Supplies

Not much is needed when it comes to making needle felted crafts. For a 2D craft, I used:
- Outline Template
- Wool Roving, any color
- Needle Felting Pad
- Felt Needle
I switched between using a tool that had many needles and a singular one but the singular one should be sufficient for this 2D craft. The tool with many needles is convenient to work at a fast pace but definitely not necessary.
Process
Crafting the Shape


The first step for making a needle felted craft is to pull the needed wool roving. I just placed this on top of the desired shape and placed everything against the needle felting pad. Then it’s time to do a bunch of stabbing. It sounds a little strange but that’s really all there is to it. Just repeated stabbing with the felt needle.
The needle will compact the wool roving as it’s continuously stabbed and make the craft become more and more compact. I repeated the stabbing process until the wool roving could no longer be pulled apart with my fingers.


Where you place the wool roving in the beginning is important because that will determine where the thicker sections of the 2D craft will be. The side that has been stabbed will have some reminiscence of that at the end but the side that was against the pad will be smooth.
Then I stabbed the top of the heart and glued a metal pin in the top to create a hook to hold the keychain.
Making a Template
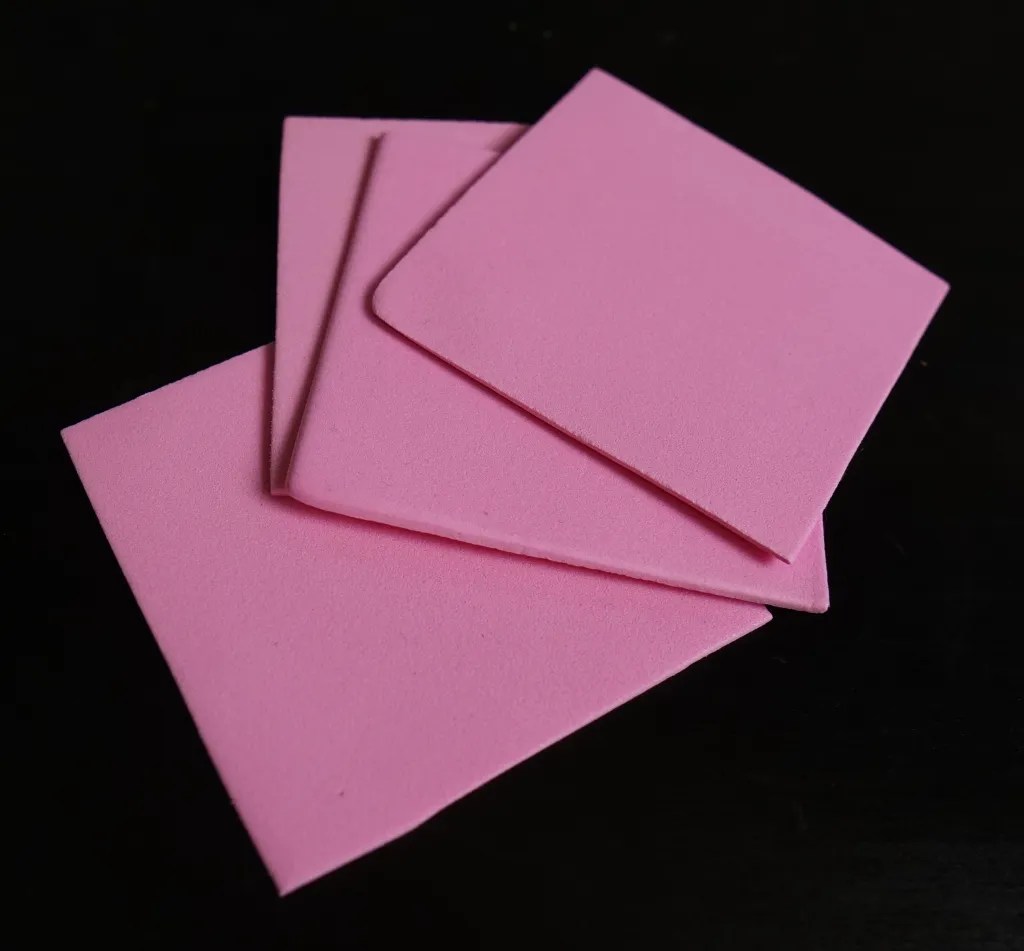
I wanted to make a meeple needle felted 2D craft, but I didn’t have a meeple template. So, the next logical step is to make one! I grabbed a foam sheet and cut it into four pieces, stacked them on top of each other, and glue them together.


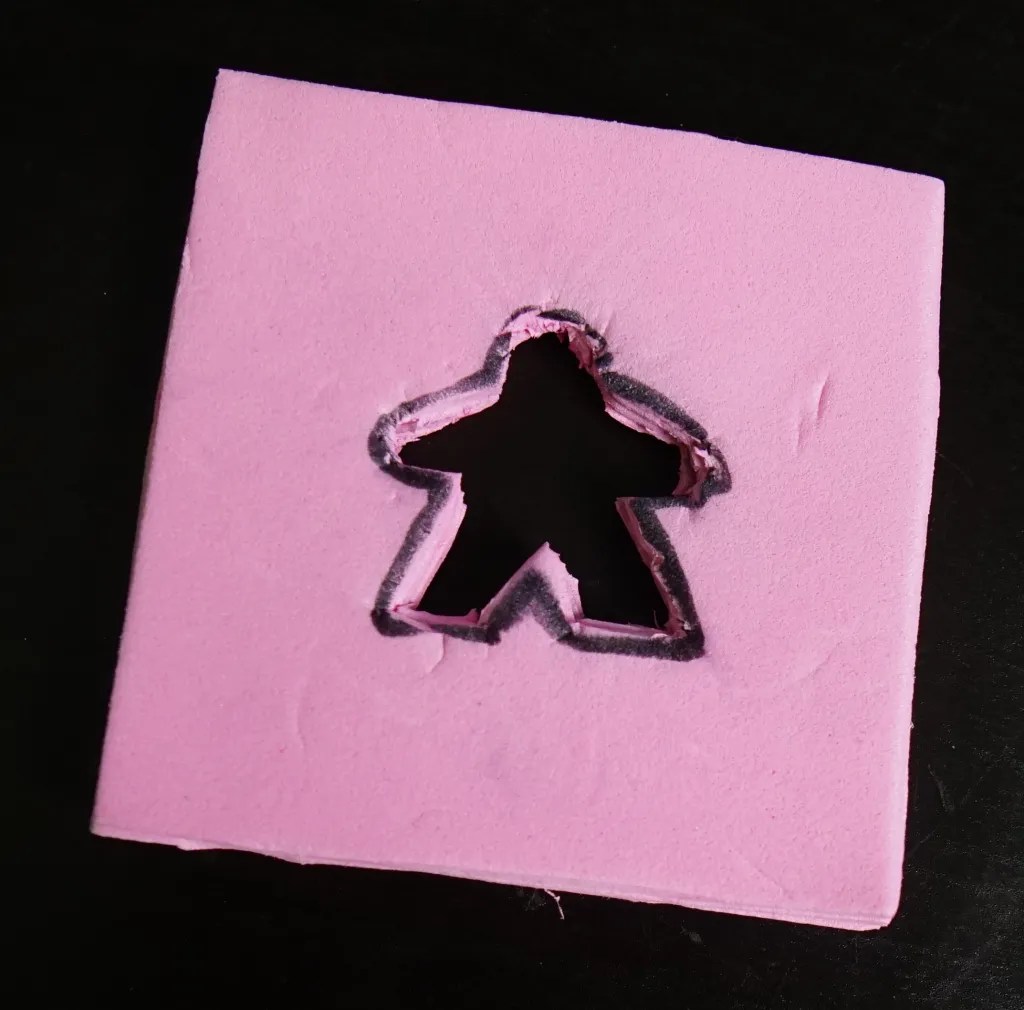
Then I drew an outline of a meeple on the foam (using a printed template from the internet, I wanted it to be one inch high). After that, I cut out the foam to hopefully make a close-ish meeple shape. This step proved to be a little more difficult than I originally anticipated but it looked pretty decent.
Now onto needle felting step. I put the wool roving on top of the foam template and started stabbing down into the template to shape the wool roving. I got the wool roving to look pretty before adding the keychain hook.


Reflections
Overall, this was a fun new craft to learn. I really enjoyed making these needle felted crafts because there was a lot of stabbing. Not going to lie, the stabbing felt kind of good to get out some emotions. I did have to scale it back a little bit because I was stabbing the material a little too quickly.

There was more stabbing required than I anticipated though. I definitely was impatient in getting this project done but it does require a little patience and some fine-motor skills. But the results look super good but I’m excited to make a 3D needle felted craft (in a future post)
Lessons
Using the Right Tools
Using the right tools is very important when doing any crafting projects. The wrong glue won’t hold, the wrong knitting needle will make the project size wonky, and the wrong felt needle won’t do anything. And that’s kind of what happened to me when I first started doing this project.
I just picked up the first needle that I saw out of my kit, and it was not a felt needle. So, as I was stabbing away, literally nothing was happening. And I was getting frustrated. But when I switched to the right needle, it was all smooth sailing. Taking time to slow down and get the right tools saves a lot of trouble later down the road.
Quick Recipe
2D Needle Felting
Materials
- Outline Template
- Wool Roving any color
- Needle Felting Pad
- Felt Needle
Instructions
- Stack the template on top of the needle felting pad. Place the Wool Roving over the template.
- Using a singular felt needle, compact the wool roving into the template until you can no longer pull the wood roving apart.
- Remove the wool piece from the template. Use a needle to create a hole in the top of the project and use glue to fasten the jewelry hook.


Leave a Reply